 StoreEdit AI
Getting started with StoreEdit AI
Install the two plugins, connect your assistant, and make your first change. About fifteen minutes.
What you need
- WordPress 7.0 or later, PHP 8.1 or later, and WooCommerce.
- A shop that is online over HTTPS. Your assistant connects to it over the internet, so a site on your own computer will not work.
- An AI assistant that can connect to a remote MCP server with OAuth sign-in. StoreEdit AI was built and tested with Claude and ChatGPT. MCP is the standard way an AI assistant connects to another system.
- A WordPress user who can manage WooCommerce, to approve the connection and the changes.
Single sites only: multisite is not supported.
1. Install the two plugins
Your purchase gives you two plugins: StoreEdit AI and StoreEdit AI Pro. Pro needs the first one, so install them in this order.
- In WordPress go to Plugins → Add New Plugin → Upload Plugin, choose the StoreEdit AI zip, install and activate it.
- Do the same with the StoreEdit AI Pro zip.
- Open the licence screen of StoreEdit AI Pro in the WordPress menu and enter your licence key.
2. Connect your assistant
- Open StoreEdit AI in the WordPress menu. Under “Your assistant” you will find the connection address of your shop. Copy it.
- In your assistant, add that address as a custom connector (a remote MCP server). The setting is in the assistant’s own connectors or apps section; its name changes from time to time, so look for “custom connector” or “MCP”.
- The assistant opens your shop’s sign-in page. Sign in as an administrator and approve the connection.
The first time you approve a connection, the plugin creates one account, aicm-assistant, with a role that can read products and propose changes and nothing else. A connected assistant acts as that account, never as you. You can revoke a connection at any time from the same screen.
If the sign-in fails. The sign-in needs two addresses under
/.well-known/to reach WordPress, and some hosts stop them. The StoreEdit AI screen checks this and shows the exact rule to send to your hosting provider.
3. Ask for your first change
Start with something small and easy to check. In your assistant, write for example:
Raise the regular price of all products in the category Shoes by 5%, except the ones on sale.
The assistant reads your catalogue and prepares the change. It tells you how many products it looked at and how many would change. Nothing has been written.
4. Review and apply in WordPress
Open StoreEdit AI in WordPress. The request is waiting under “Waiting for your approval”. Press Review.
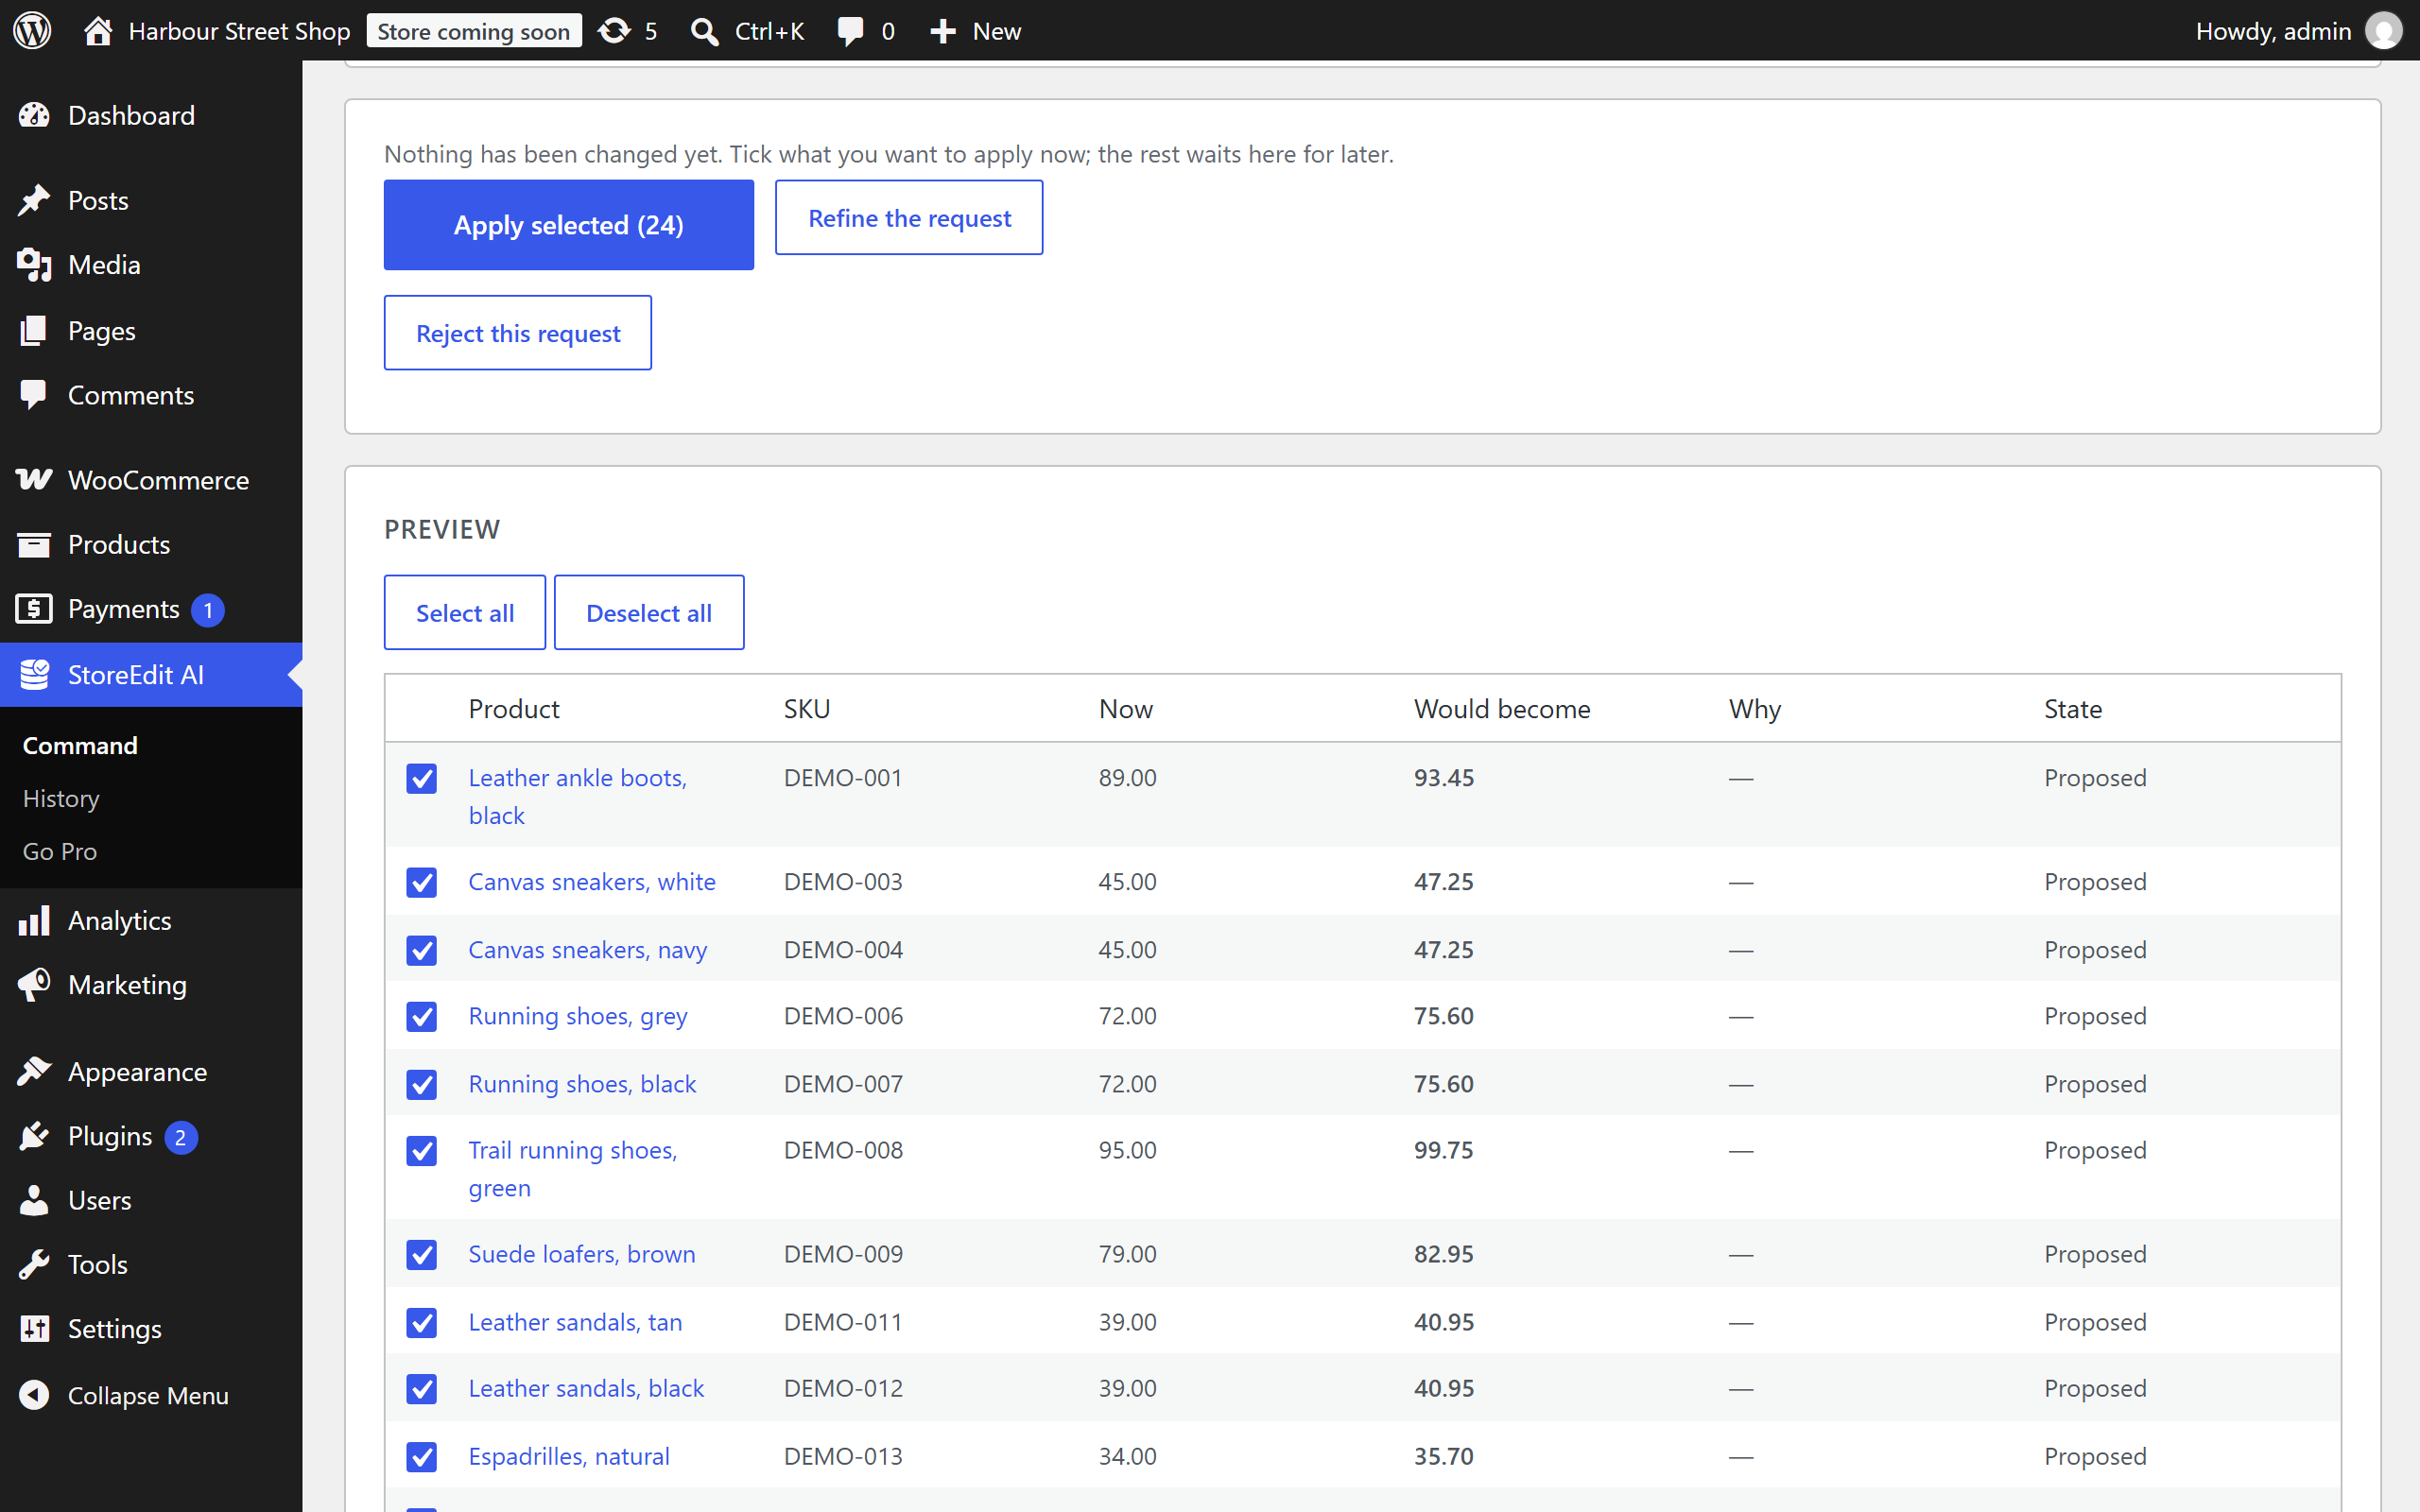
- At the top: your request word for word, your assistant’s summary of it, and how the shop understood it. If it understood something else, you see it here and not on your products.
- Then the counts: products looked at, products that would change, and the ones left out and why.
- Then every row: product, SKU, the value now and the value it would become.
Untick anything you do not want and press Apply selected. Rows you leave unticked wait, and you can apply them later. Large requests are written in the background, so you can close the browser.
Each row is checked again at the moment it is written. A product that someone changed since the preview is skipped and listed as skipped.
5. Undo
On the request’s page, Undo these changes puts back everything the request wrote. Each row also has its own Undo. Undo restores exactly the value that was there before. A product that someone changed in the meantime is left alone, and you are told.
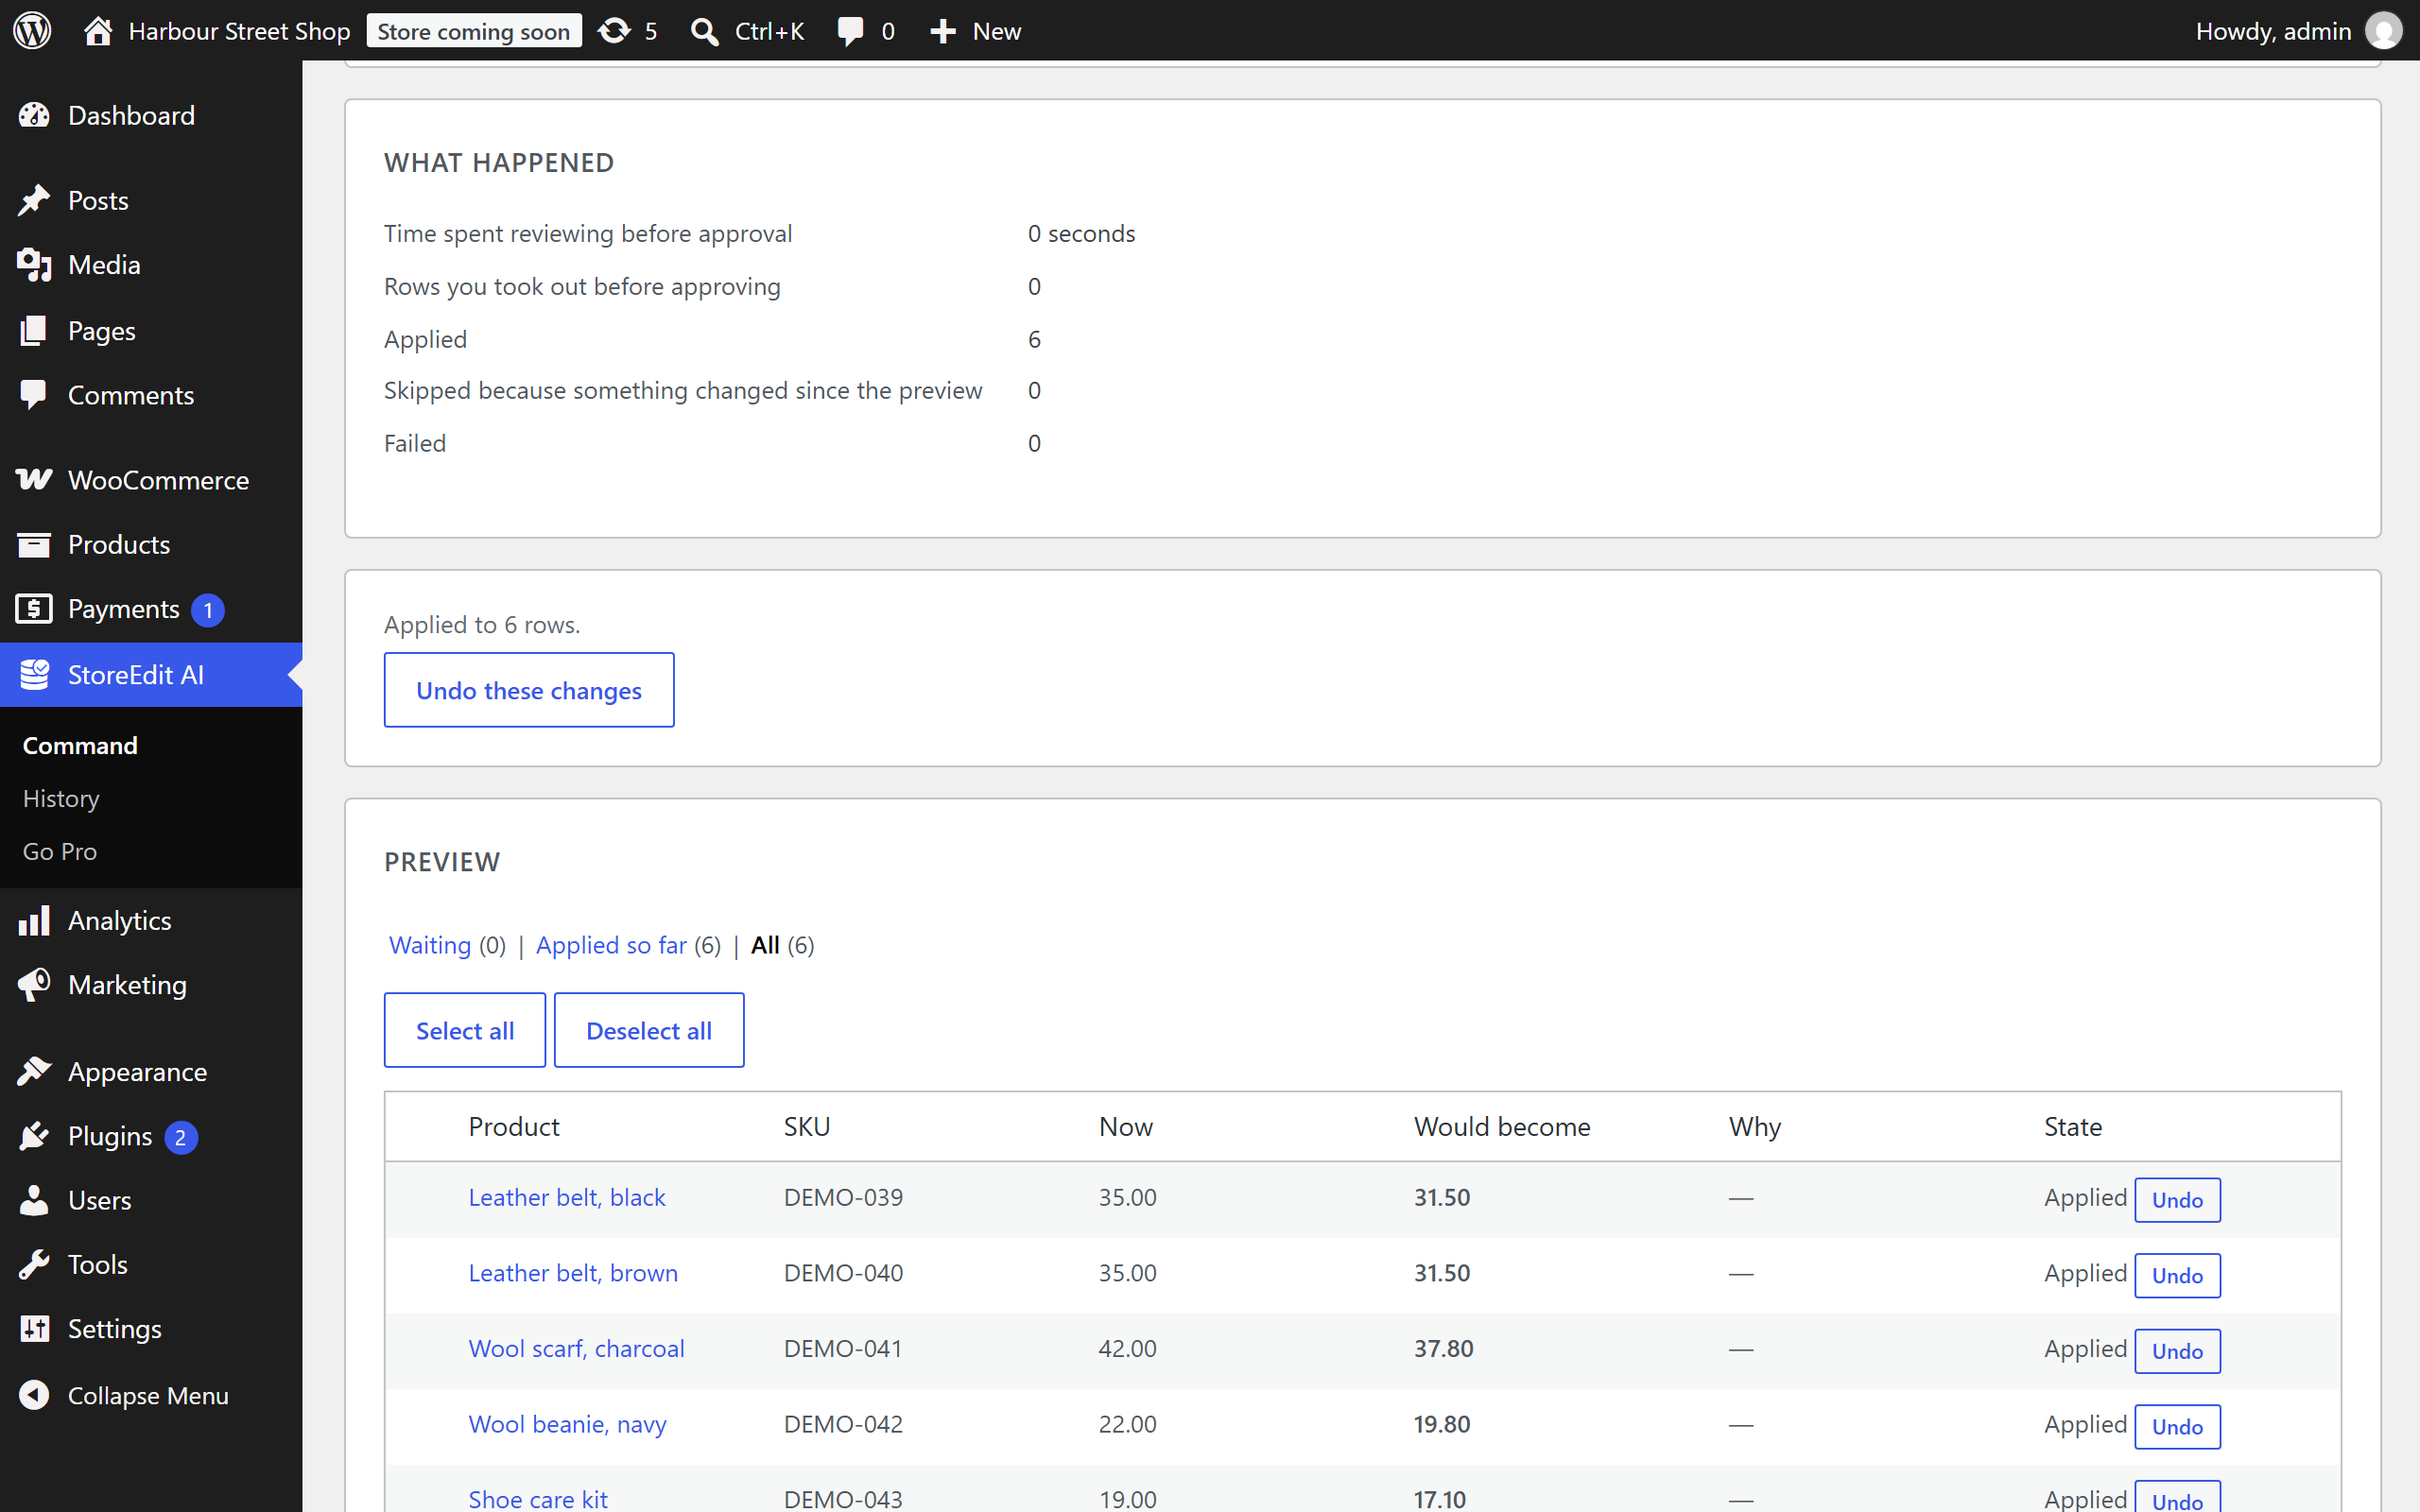
The History screen lists every request: what was asked, when, and what became of it.
What you can ask for
| Change | An example |
|---|---|
| Regular and sale prices, sale dates | “Put all bags on sale at 20% off until 31 October.” |
| Stock quantity and stock status | “Set every product in Clearance to out of stock.” |
| Categories and tags | “Add all accessories to the Gifts category as well.” |
| Product status | “Publish the drafts tagged spring.” |
| Attributes | “Find which products are blue and set Colour.” |
| The right category | “Find the products in the wrong category and move them.” |
| Titles and descriptions | “Write a short description wherever one is missing.” |
| SEO title and meta description | “Write a meta description wherever one is missing.” |
| Product addresses (slugs) | “Make the product addresses short and readable.” |
You choose products by category, tag, product type, status, and whether they are on sale. Titles, descriptions, SEO fields and slugs take up to 1,000 products per request; ask again for the next thousand.
SEO titles and meta descriptions are written into the fields of Yoast SEO, Rank Math, SEOPress or The SEO Framework, whichever your shop has. All in One SEO is not supported yet.
What it will not do
- It does not create or delete products, and does not touch images.
- It does not read or change customers, orders, payments or shop settings.
- It does not act on its own. Every change waits for a person.
Something not working?
Write to [email protected] with the address of your shop and what you see on the StoreEdit AI screen.